Hardware & Physical Build
A 10 inch DeskPi Rackmate T1 housing everything in one clean, cable-managed unit — including custom 3D printed mounts.
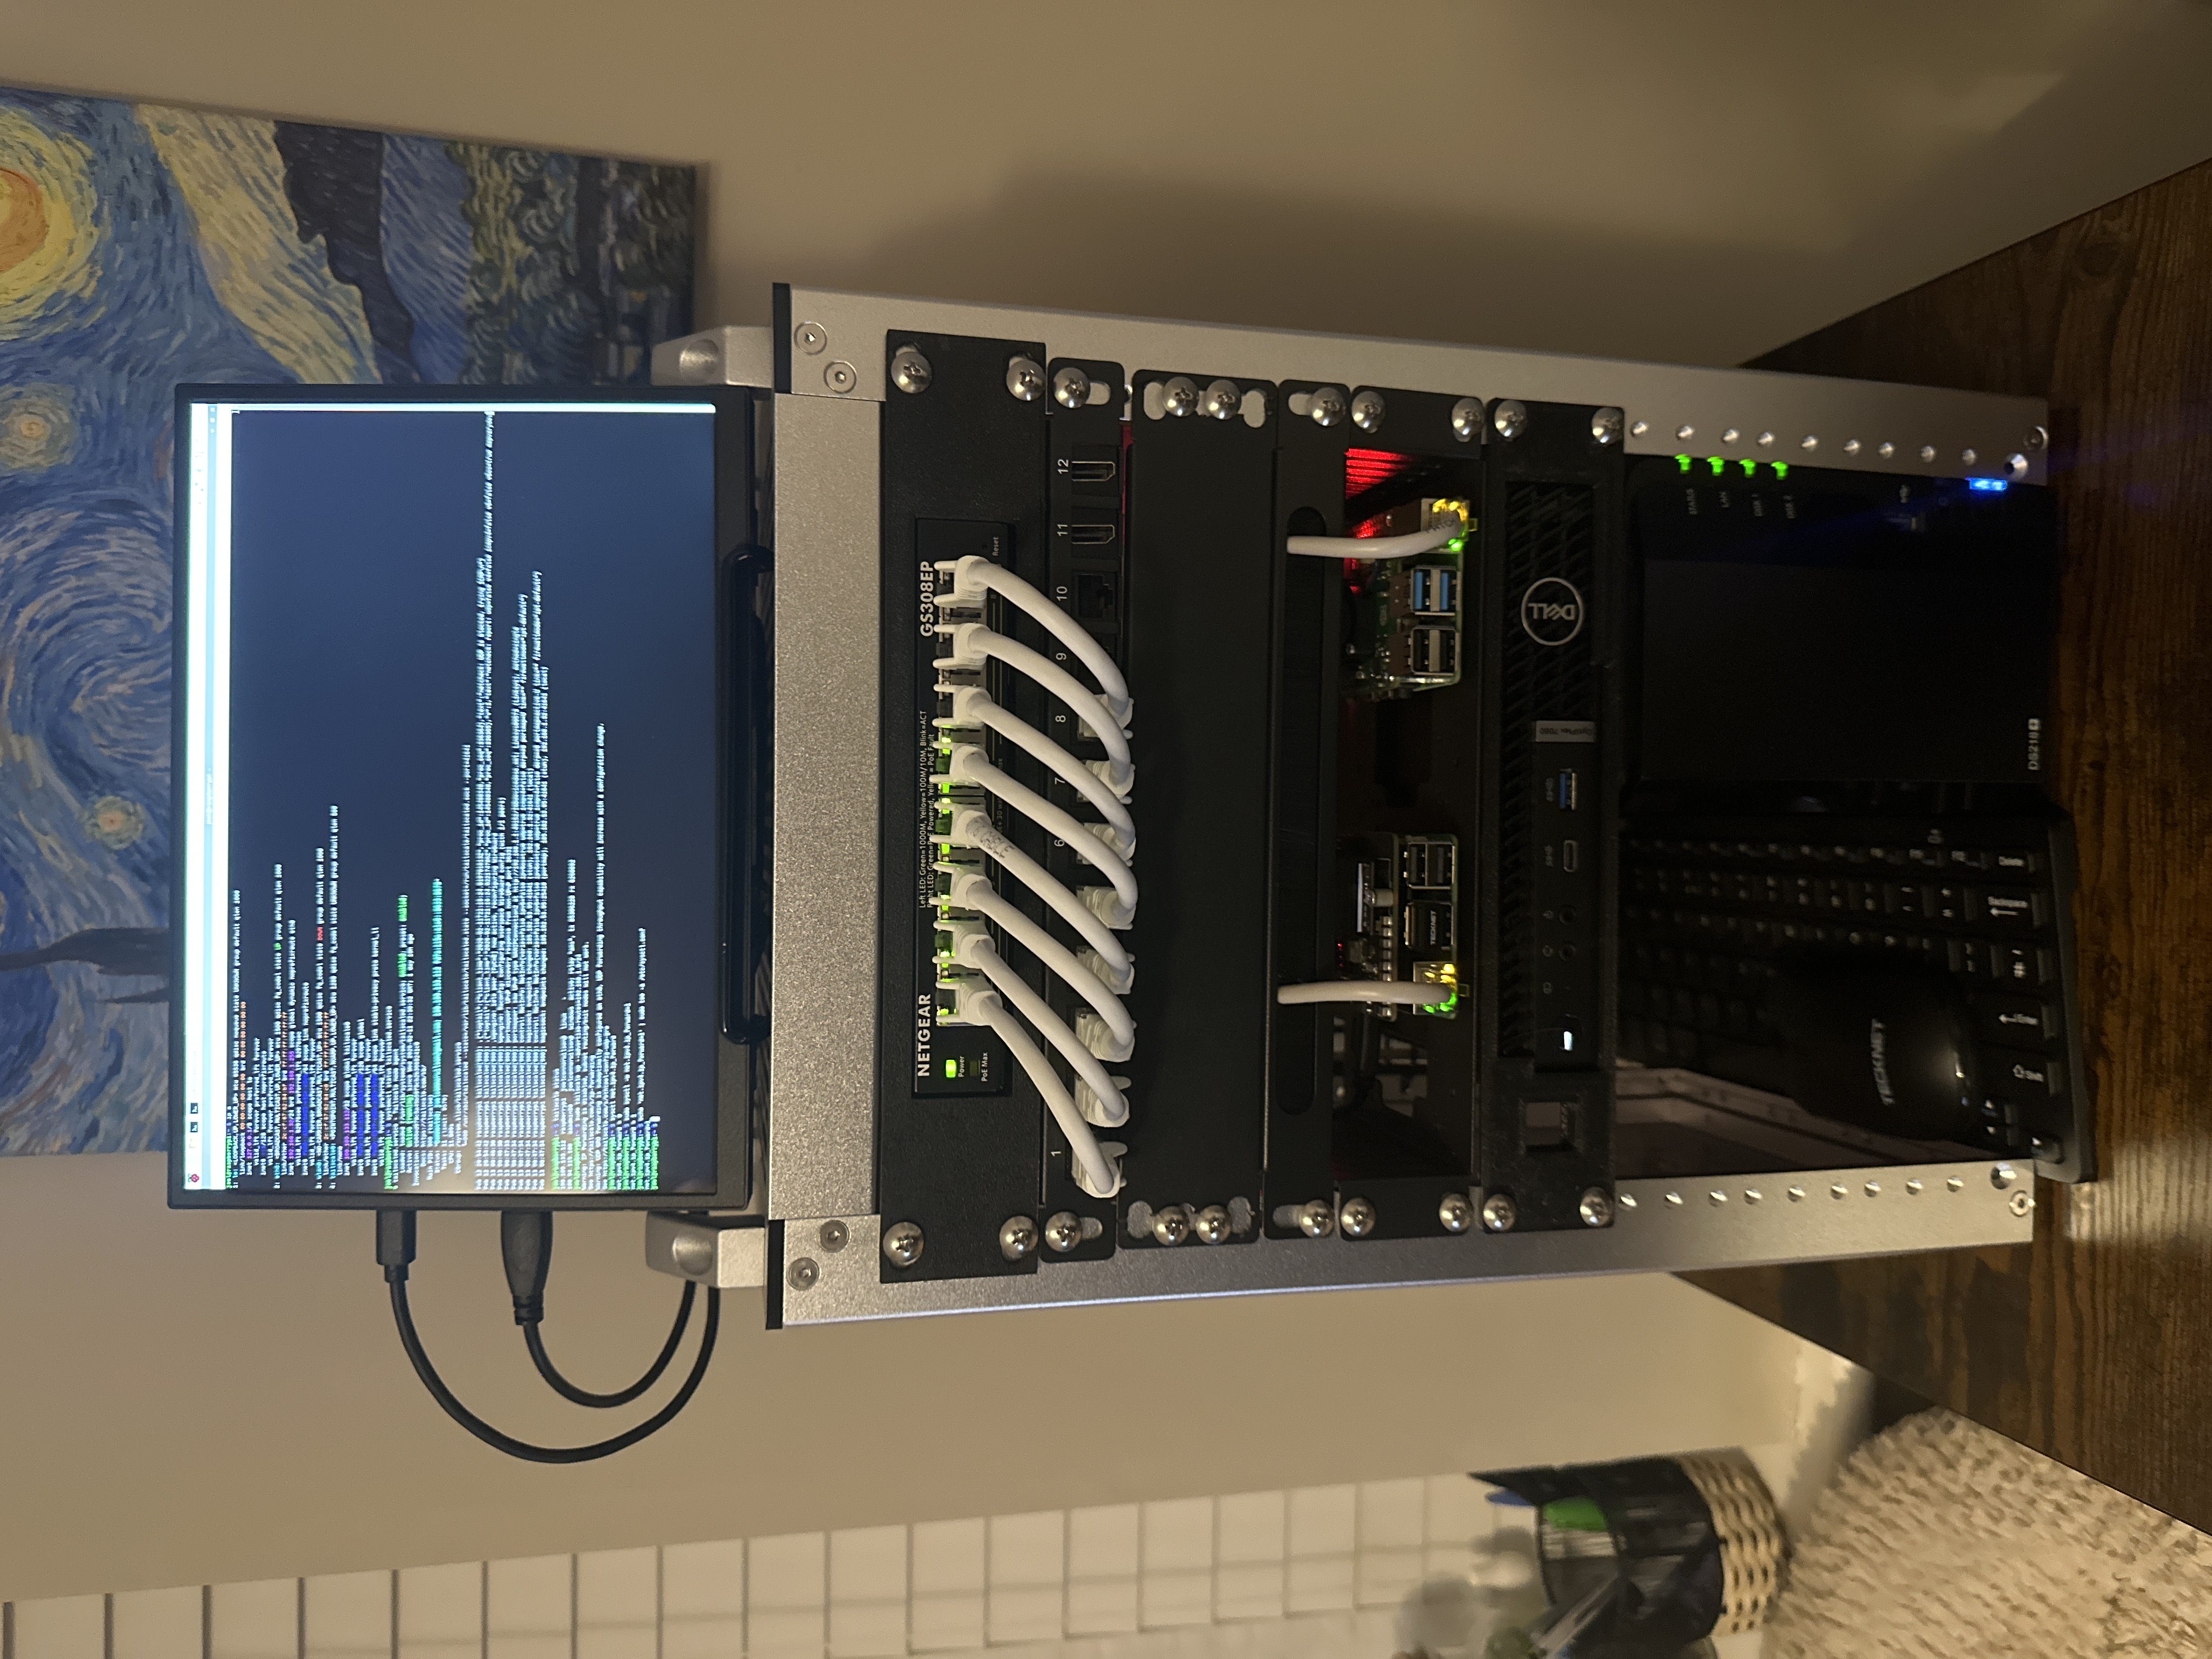
The Rack
Everything sits inside a DeskPi Rackmate T1 — a 10 inch mini rack that keeps the whole setup contained, tidy and on a single desk. The constraint of working with a smaller rack actually made the build more interesting, forcing deliberate choices about what goes where and how cables are routed.
Layout (Top to Bottom)
- ZSUS 10.5" Ultra Slim — Cheap eBay monitor connected to the Pi 5. Sits ontop of the rack
- DeskPi Rackmate T1 — Great rack, fun to work with, can fit more than you think! lol.
- Netgear GS308EP — 1U 8-port PoE+ managed switch in. Powers the Raspberry Pis over ethernet so no additional power bricks are needed for them.
- 12-Port Keystone Patch Panel — 0.5U Five active ports: LAN, OptiPlex, NAS, Pi 4 and Pi 5. Three additional cables run to the switch purely for aesthetics — a full switch just looks better.
- Blanking Plate — 1U gap between the patch panel and Pi shelf.
- Cable Brush — 0.5U Cable brush to keep the Cat6 cables to the Pis neat
- Pi Shelf — Raspberry Pi 5 (left) running Tailscale, Raspberry Pi 4B (right) running PiHole. Both powered via PoE from the switch above.
- Dell OptiPlex 7080 — the main Proxmox host. i5-10500T, 64GB DDR4, 1TB NVMe.
- Synology DS218+ — 2-bay NAS at the bottom with 12TB of storage for media and backups.
3D Printed Mounts
The OptiPlex and switch both use custom 3D printed rack mounts found online. The OptiPlex doesn't come in a rack-mount form factor so without a printed bracket it simply wouldn't fit. The switch mount keeps it properly seated in the 1U slot rather than just resting on rails.
Cable Management
Working in a 10 inch rack doesn't leave much room to work with. Short patch cables were key — anything too long creates bulk that's impossible to hide in a tight space. Behind the rack is where most of the cables are hidden but even those are grouped together and managed neatly.